Starting a WordPress blog on Bluehost is as easy as you can do in just a few minutes from your time, almost the same time it takes to you enjoy your daily breakfast.
In this post, I will answer the question “How to Start a WordPress Blog on Bluehost” in deep details.
to start a blog in 2020 is really easy if you have zero background in blogging or website development it is also fine, I will show you here in this post how to start your WordPress blog, hosted in Bluehost step by step from A to Z
Congratulations for being here and for your wise decision to start your dream blog
To start your blog, first, you will need two things,
- A domain name, that represents the blog topics and the niche that you are going to write about and hosting platform that will carry your blog on the web for the world.
- Web hosting platform, which will host your domain on the web.
In this post, I will use WordPress the most reliable and trusted content management system “CMS” in addition to the most famous hosting platform BlueHost.
As a little bonus from me, by end of this post, I will leave a discounted link for Bluehost with extra discount just for you
Please note:
This post contains affiliate links to products I use, trust, and recommend. If you choose to purchase a helpful product using these links, I may receive a small commission for referring you – at no extra cost to you. These funds help me keep this blog up and running.
Table of Contents
How to Start a WordPress Blog on Bluehost – “My deal for you”

I know that it may look complicated for you to start a new blog, a lot of technical issues and many steps to do.
moreover, you want to make sure that you do it right without any mistakes.
I will make it very simple for you and I will cover all the points that you wish to start your blog from scratch.
Furthermore, I will help you to start running live before you go to bed tonight.
the best part is that I will start this tutorial as a complete beginner that has zero experience in blogging or websites, all you need to do is follow up with me and start to apply step by step.
Therefore, by the end of this post, you will have the perfect professional set up for your website or your blog from the beginning for many years to come.
I always use the exact same tools in this Bluehost WordPress tutorial for my own blogs so I know they work 100%.
That said, follow along and I will help you start your first WordPress blog on Bluehost now before going to your bed tonight!
Are you ready! let’s get started.
What you need to start a WordPress Blog on Bluehost?
All you need to start your blog online is,
- Domain Name, the words that people type on their web browsers to see and visit your blog, also you share the domain link in your social media platforms like, Facebook, LinkedIn, Instagram, Pinterest, etc…
- Domain hosting plan, a hosting platform that saves all your files and data online.
- Blogging platform, a content management system that helps you to build and manage your blog, writing your posts.
Not quite sure about that? Don’t worry. we are going to discuss each one of these terms in details.
Blog hosting and Domain name

When you think about blog hosting, there are three things you need to consider
- Easy technical setup:
As you don’t need to spend hours trying to understand a complex setup on your hosting, invest the time in your blog posting. - Trusted and durable:
the blog needs to be up running 100% of every moment without any interruptions. - The speed of page loading:
The time it takes to load your blog pages for your visitors.
All of the above factors will help you save your time and start to increase your profits with your blog.
Meanwhile, your WordPress blog runs smoothly, your visitors will stay for longer time consuming reading your content. This means more loyal customers, more profits from your ads, and more success and power for your blog.
What is the hosting provider I should use in 2020?

There are many companies that provide hosting services for your blog.
From my experience, I know that it is really hard for a beginner to decide on which platform he should host his blog, moreover which plan is suitable to choose.
I will help you to save time and money by sharing with you the results I got from my research over the past few years.
Remember that I was also a beginner and I spent a lot of time and money to get these results, which built on try and error experiments from my blog.
However, you are lucky now to get the correct advice on the right time.
Therefore, I’ll make sure you won’t run into any technical issues with your new blog.
You can decide to choose any other web hosting provider and I’m sure that there are many great names in this industry.
My recommendations here are based on my previous experience,
and as said try and error trials that I had done before, so I ake sure it will work for you as it works for me.

At the same time, I want you to avoid the hard times I faced with some hosting solutions that are complicated, expensive or even not durable.
Thus, make sure to save your money and your time when choosing a web hosting solution.
I always use and 100% recommend Bluehost for the domain name and web hosting
You can start running your blog live in just 10 minutes with Bluehost, it is pretty easy to use even if it is your first time to blogging, as well, Bluehost is automatically installed WordPress blogging software for you.
Just sign up and start blogging immediately.
Why I always recommend Bluehost as the platform of choice for blog hosting & domain services?
As said, I tried many web hosting platforms for many years, until I find Bluehost that provide me with many benefits, like,
- FREE domain name:
Just choose a great name for your blog! - Great price for only $2.95/month:
An economic hosting plan that meets your needs and your budget. - Easy to understand and manage:
We will discover that together in the coming section. - No hidden costs “Like others”:
A complete transparent policy. - Free, automatic WordPress installation:
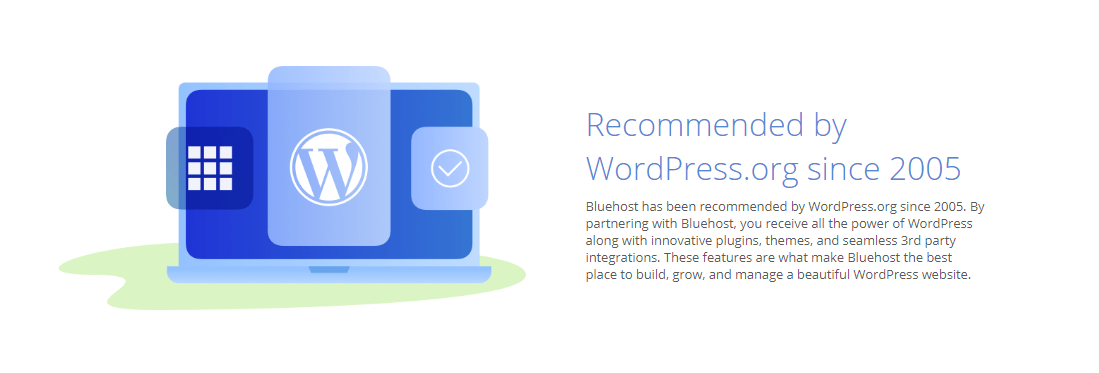
The blogging software that helps you to build your blog, you can start blogging immediately. - It is also recommended by WordPress:
Yes, even WordPress itself recommends Bluehost as a trusted hosting provider. - A Free SSL Certificate:
Get trusted by Google and your visitors. - Free email accounts:
Free email addresses with your blog name. - 24/7 friendly support:
Quick support with 24/7 availability helpdesk with chat. - 30-day money-back guarantee:
Get your money back if you choose to cancel your account for any reason, No questions asked.
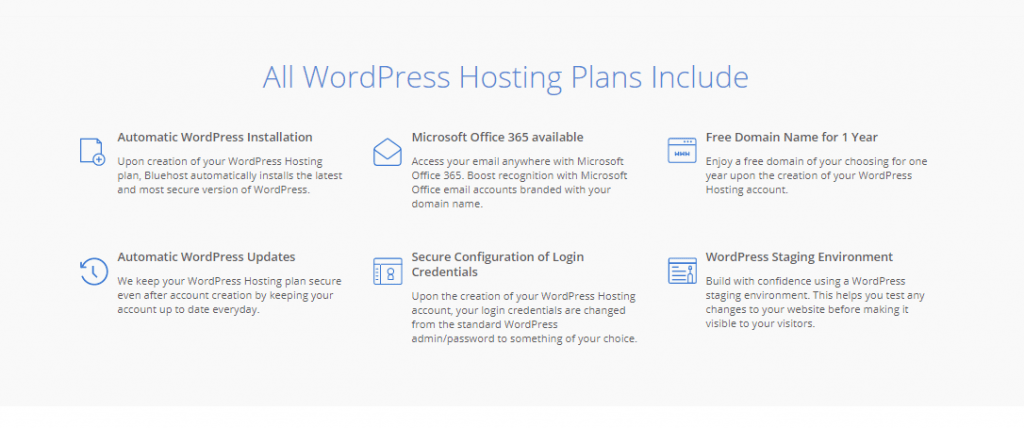
In summary, Bluehost will provide you with all the tools you need to start building your blog, it is easy to manage with no complicated technical steps, hassle-free service with no risk with an affordable price.
Exclusive deal for my readers in 2020:

As a thank-you gift from my side, and as promised earlier I have a great gift for you!
With L-Blogging, Grab the SPECIAL OFFER and get access to an exclusive blog hosting package with 60% discount starting at $7.99 $2.95 per month!
Great, now you have your domain name and web hosting settled. Awesome!
Let’s now go to the next step: the platforms and software
I highly recommend using WordPress to start building your blog.
WordPress is an easy platform to use “especially for beginners” You can learn it in few minutes and start your first post in few minutes, as well, it is fully customized for you and by spending some time on it.
You will create and build amazing well-designed posts. I will show that step by step in the coming sections.
Now, let’s get started with our Bluehost WordPress step by step tutorial.
WordPress Blog on Bluehost – Ultimate Guide for 2020: How to start your WordPress blog in just 10 minutes
This tutorial will take just 10 minutes to finish all the setup and start writing your first post.
Now, I need your full attention to start through six easy steps to get your blog live right now!
And of course, feel free to review the steps again and again until you feel confident enough to apply.
Step 1: Get your Bluehost hosting account
if you didn’t already collect the 60% discounted offer, click here to get it now
You will go to Bluehost landing page as below

Once you’re there, click Get Started Now “the green button”, On the next page, you will find three web hosting plan options (Basic – Plus – Choice Plus) choose one of them according to your needs.
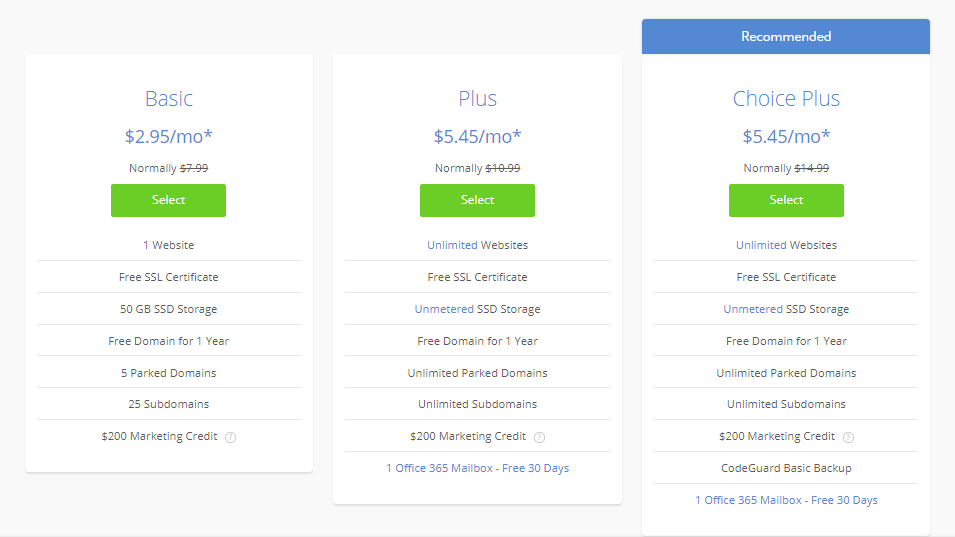
If you are just a newbie for blogging and it is your first start, I recommend the Basic plan for you.
The Basic hosting plan is the best fit for beginners as it has all the required tools for you to start your blog like a pro, and by the time you can upgrade later to another plan as your blog grow, your profits increase and at that time you can manage to invest more for better options.
I know that your initial investment in the hosting plan looks like a big sum of money.
I remember when I was in your shoes and had the same impression.
However, once you start to generate some profit and your business start to grow, you will compensate all of the expenses within few weeks, maybe even a few days “if you know well how to manage your blog”
As well, this step is the most important one in your new business, and it is a small price you will pay to go after your goal and achieve your financial freedom.
Now, after you choose a web hosting plan (Basic, Plus, or Choice Plus).
Click the “Select” button and you are now ready to go to step two “choose your FREE domain name“.
Step 2: Choose your FREE domain name
Choosing a domain name is the most interesting part for any new blogger, the domain name represents the identity of your blog and how it reflects the blog topics and what kind of visitors are going to visit you, Agree with me?
You need now to choose a suitable name that is not too long to forget nor too small to be confusing.
if you didn’t decide yet on that it is totally Ok. Simply you can skip this step for now and come later to complete.
Just click the bottom “I’ll create my domain later”
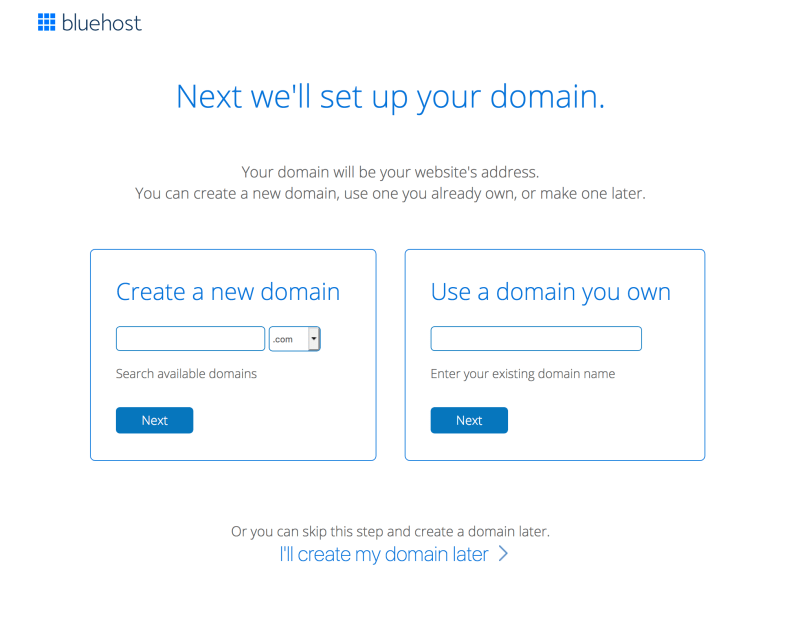
Let’s summarize this step now into one of these actions,
- You already own an old domain name, so you choose “use a domain name you own” and click next
- If you have a domain name in your mind for your blog, so you register it now for free in the “create a new domain” area and click next
- Not decided yet for a domain name for your blog, so you click “I’ll create my domain later”.
You will now go to a new page to fill in your information and set up your payment details in order to finish the set up for your domain and Bluehost hosting plan.
Congratulations, Now you finished setting up your domain and hosting on Bluehost, few steps more and you can start writing your first post 🙂
Step 3: Finish the registration process
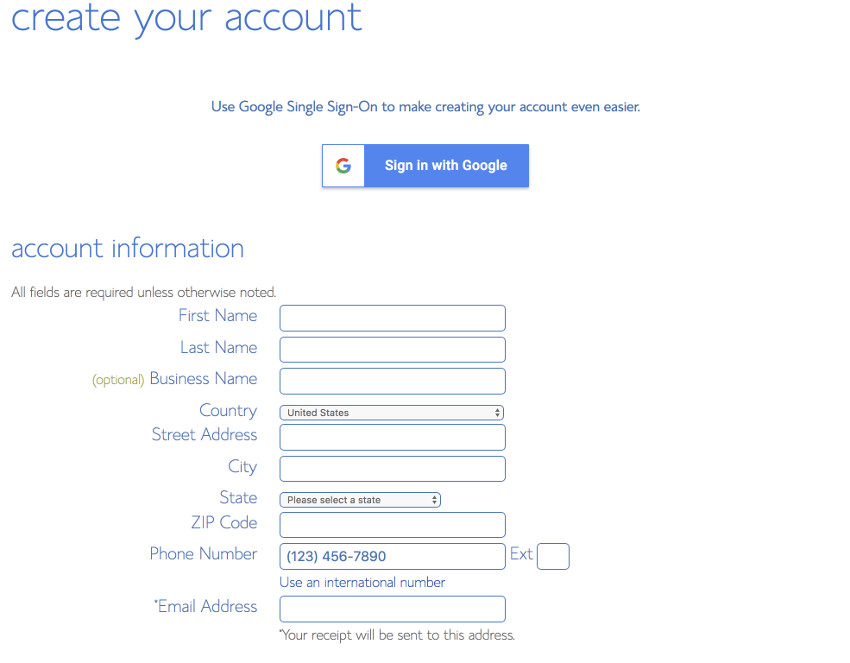
First: Create your account and fill in your account information, you can use your google account to complete the sign-in process.
Then, Choose the duration of the Bluehost hosting plan, you can choose one year, two years, or three years of hosting plan.
As you notice with me, it is cheaper when you go for a yearly plan than choosing the monthly level plan.
I recommend starting with “at least” one-year hosting plan, in order to save some money, at the same time you avoid any service disturbance in case if you forget to renew on time.
I usually go for a two years plan, as I know that I need some time to develop a strong blog, and I save much money by going for a longer period hosting plan.
After that, you can add some extra great service to your account in the “Package Extras” section.
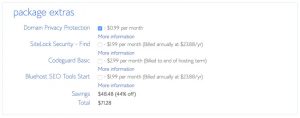
If you need more information about each service, you can click it to check, most of these services are extra services as said and not critically important to choose any, in case of your budget is tight.
I usually add the Domain Primary Protection service to add more protection to my business, also it is the best price for this service all over the market.
Finally, it is the last step, add your payment information and click submit.

Well Done,
Officially you are now a member of Bluehost community, an owner for a new blog with a domain name and hosting plan.
Now, let’s go inside your Bluehost account and set up your WordPress account to start building your blog right away.
Step 4: Install your WordPress inside Bluehost account
WordPress is automatically installed on your Bluehost account, so all that we need now is just finishing the sign-up process and login into your WordPress Bluehost blog.
Once the payment is done, you will receive a welcome mail from Bluehost with all the information that you need.
Check your email and let’s finish the set up fast together.
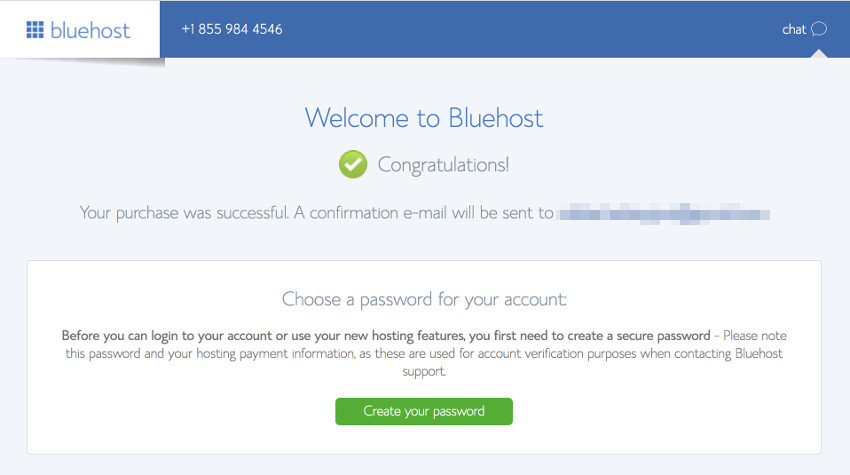
Now click the green bottom “Create your password”.
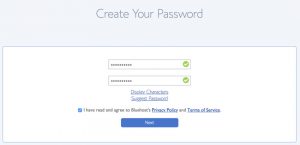
After that, from the following page, you can reset your new password for your Bluehost WordPress blog account.
Remember
Always to save your password in a safe place, as you will need it every time you log in, Don’t share your account password with anybody.
Choosing the blog theme:
In the next window, you can choose one of the available WordPress themes for your blog; you can come later at any time to change it.
Personally, I tried many themes till I finally decided on one theme that converts well with me, Doesn’t worry we are going to handle that later.

Start with your Bluehost dashboard:
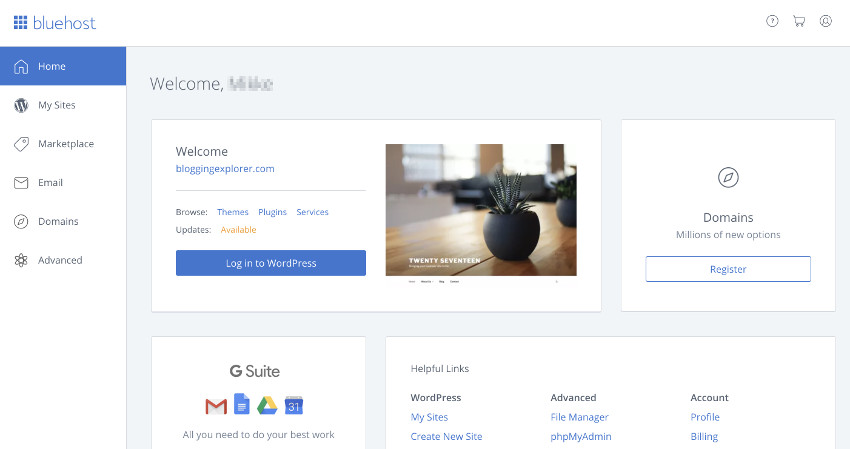
From the Bluehost dashboard, you can manage your account setting, your domains.
Click the blue bottom “log in to WordPress” to go to your brand new WordPress account, let’s go now to set it up.
Step 5: Start with your new WordPress Bluehost account
Now we just finished all of the hard technical set up, was it hard for you? If you feel a little tired no worries. it is done, you can now relax as all of the hard work is done. we have now a domain name and WordPress account that are hosted on Bluehost for at least one year from now.
We are going now to the next easy and interesting steps, starting with WordPress account 🙂
From now and on, you need to get more familiar with WordPress as you are going to use it on a daily basis “as in my case”, you need to share useful content with your visitors, and keep them happy with your blog.
Remember that the key success in the blogging business is consistency, yes consistency is the word or we can say the key to success.
So, in this final steps from our WordPress blog on Bluehost – Ultimate Guide for 2020 I will make sure that you can use the initial tools inside both WordPress and Bluehost to strat blogging tonight as promised.
WordPress dashboard:
In order to go to your WordPress dashboard, click the blue button “Log in to WordPress”

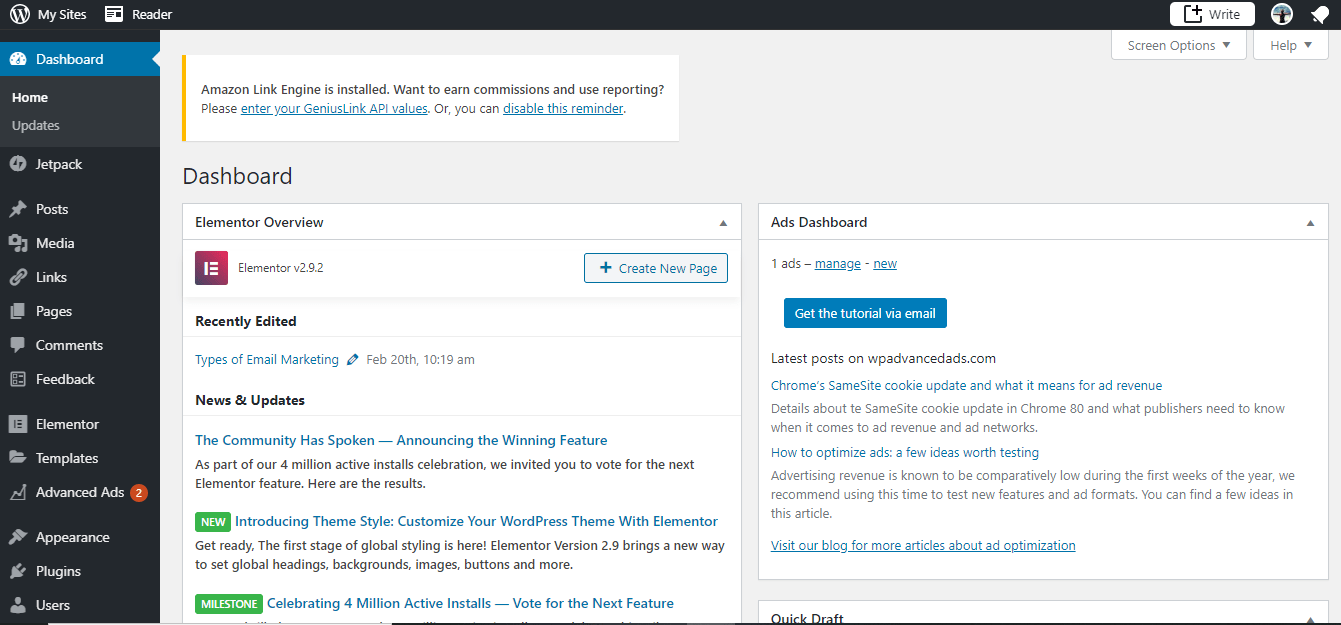
You will land to your new WordPress dashboard as below.
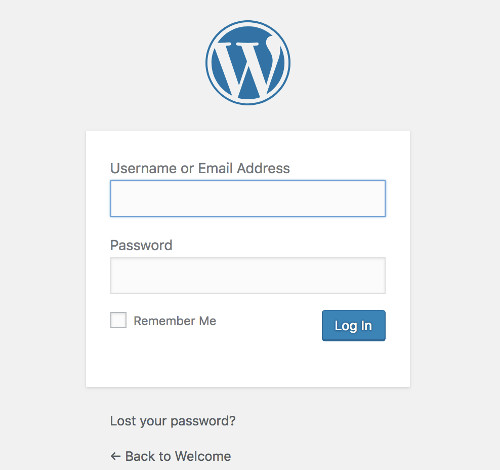
Now enter your user name and password and click login,.
In case you don’t remember your user name or password check the email you received earlier from Bluehost.
Promptly, you are inside your admin panel of WordPress, the place that you are going to use to build your blog, remember to save your user name and password in a safe place.
As well, save this page in your bookmarks as you can access it easily in the future.
Your WordPress control panel is dedicated only for your use and no one from your visitor can see.
My control panel looks complicated? 🙂 don’t worry I will guide you step by step to have a WordPress control panel like it.
Introduction to the main key features
On the left-hand side, you will find some key features that will help you to build up your blog and create your first post, let’s now go through all of them one by one.
- Posts: you can access your posts, write, edit, publish, and manage them.
- Media: upload all your media files (images + videos) that you are going to use inside your blog posts.
- Links: where you find all of your links, links category and manage the link’s setting
- Pages: create your blog pages, like contact us page, about us page, etc…
- Comments: find all of your visitor’s comments, you can approve, replay or control the comments for more engagement.
- Appearance: choose, upload new blog themes, customize your WordPress blog theme as per your needs.
- Plugins: add new features to your WordPress blog, like adding security plugin, social media share plugin, SEO plugin and much more.
I know that the WordPress control panel may look complicated for the first time.
however, don’t worry about that, and by spending some time and some daily practice it will be super easy for you to use.
Personally, I spend about two days to understand everything inside the initial functions like posts, pages, appearance.
later, you will learn more by practising the other functions one by one.
Now it is the time to create your first post as promised you to do before going to your bed tonight.
let’s now jump in the control panel and show you in details How to start WordPress Blog on Bluehost.
Step 6: Create your first post on your blog
You are going now to write your first post on your blog, are you excited?
Usually, in the first post, you need to write something that is simple and represents you.
So let’s write something about yourself, your name, education, family. then why you decide to start blogging.
You can also write about your goals, your dreams and your achievements.
Simply make your readers and visitors know more about yourself and about the main topics of your new blog. Ready?
Let’s get started!
1- Open the posts editor in your WordPress control panel
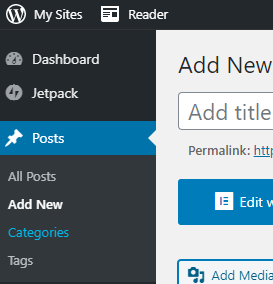
First, open the WordPress dashboard, then go down in the left-hand side menu, click posts.
Choose the “Add New” option from the submenu (Posts > Add New)
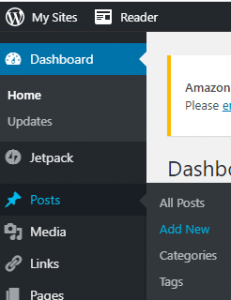
It will open a new blog post editor screen like this
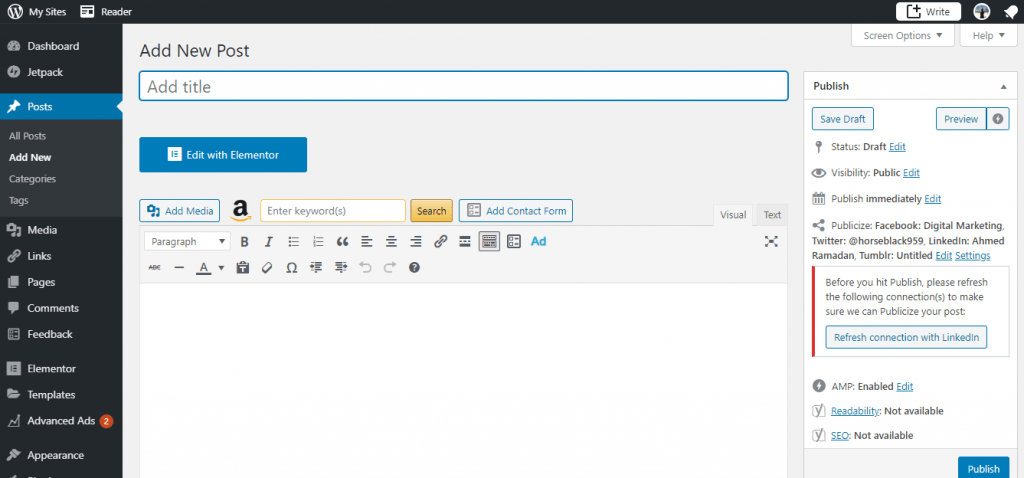
This blog post editor is equipped with many useful tools, that you will use to edit your text in order to create your post.
let’s go now and highlight some functions to learn how you can use.
2- Add Title to your blog post
Add your blog post title inside the “Add title” space, try to choose a catchy title that your visitors love and make them motivated to click and read.
Try to make your title between 4 to 7 words.
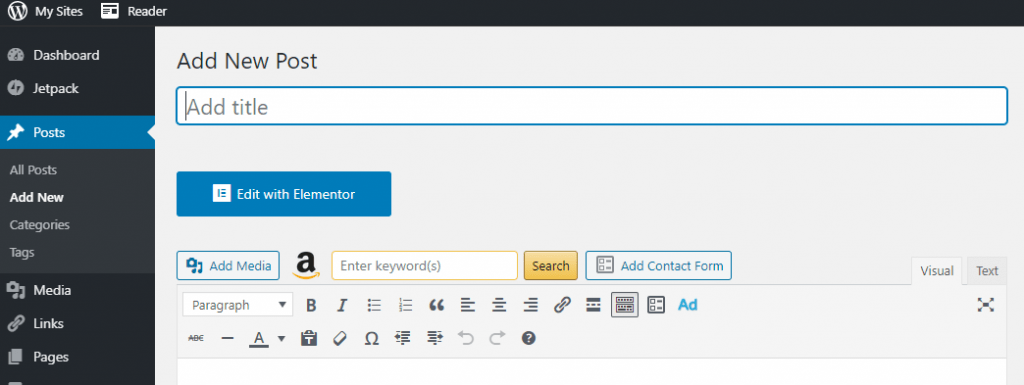
3- Write paragraphs and heading for your blog post
Now, after you write your title, start to write the blog post content.
Try to make it short paragraphs under a certain topic, “the heading”
For example,
If you are writing about your new blog and why you decided to start blogging, you have some topics like,
Why I start blogging “Heading”
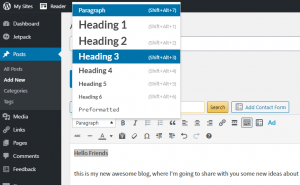
I start blogging, as I want to share with you, 1,2,3, etc…. “Paragraph”
Now after you finish writing your blog post content, you need to add the heading.
just choose the heading words and use your mouse to open the drop-down menu.
You can choose one of these options, Heading 1, Heading 2, Heading 3. Or you can call it H1, H2, and H3 headings.
In general, you use the same H2 for the Headings with the same power or importance “Like the main topic”.
After that, within H2 you can add H3 and H4 headings to display the hierarchy structure of your post.
4- How to change the formatting and adding style to your paragraphs?
By using the WordPress blog post editor, you can format and style your text by using some easy tools.
Use the “Bold” tool to make your text bold
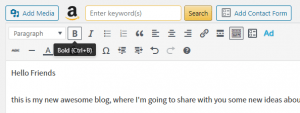
Use the “italic” tool to make your text italic
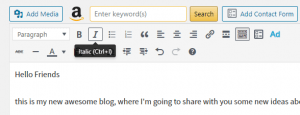
Use “Boletted list” to make a list of bullet points.
“Numbered list” to make a list of numbered points.
As well, you can try other tools, like, text alignments (right, centre, left). easy to use, right?
5- When to add links to your blog post?
Adding a link tool will help you to transfer a normal word into a hyperlinked word, that will redirect to another destination once you click.
Adding a link is an important tool you need to use while you write your posts.
Mainly, there are two types of links, internal links and external links.
- Internal links: refer to one of your blog posts
- External links: refer to an external website
You can use the add link tool as below,
Just highlight the words you want to link by using your mouse, then click the “Add-link” tool.
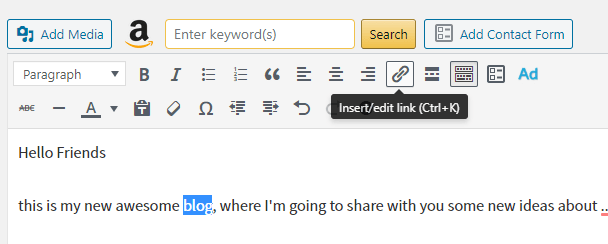
After that, you insert the link address in the space as below and click the blue arrow in the right side.
You can test your links to make sure that it works in three ways,
- It will show line under the hyperlinked words
- Different colour for the hyperlinked words
- When you click the word inside the WordPress editor, it will show you the link address

6- How to add media to your blog post?
Now let’s add some lovely images and videos to your blog post.
Adding images and videos will help you to make your blog posts looks more readable and interesting for your visitors.
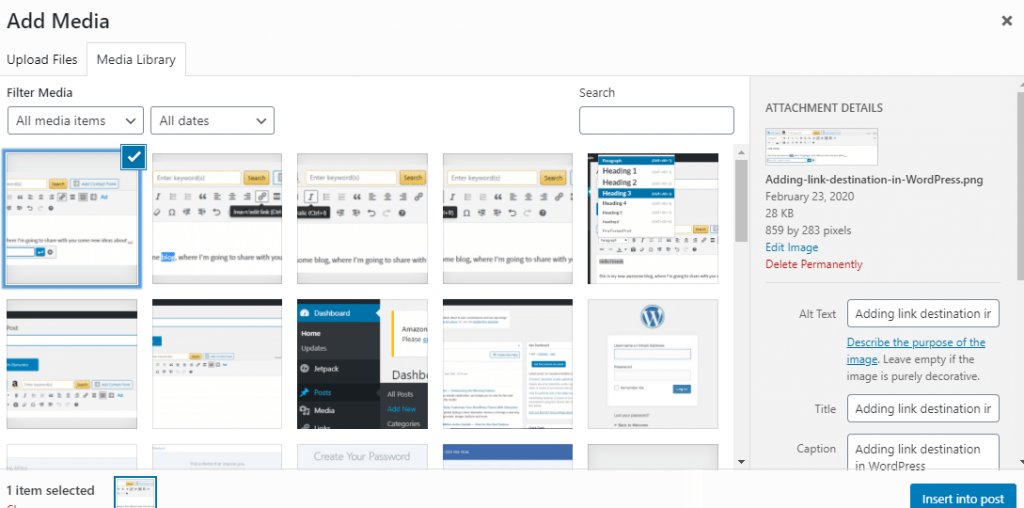
The WordPress post editor tool, you will find it super easy to insert multimedia inside your post.
Just go now to the “Add media” button on the top left side of the WordPress editor.
Now, you can choose either to insert an image or video from your current library.
However, in our case, as we just building a brand new blog.
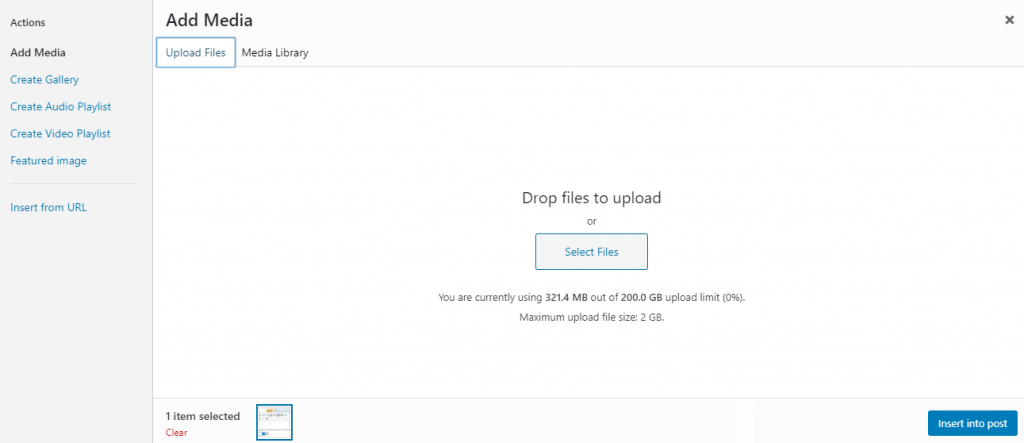
Accordingly, you will need to upload one file from your computer as below.
select your file or you can drop files to upload.
You can upload as many files as you need,
just select all of them at once, after that click “Insert into post”
7- How to add your post under a blog category?
Why we use the blog post category?
In order to add a category inside your WordPress blog that contains one or more posts under the same division,
likewise, adding travel posts under the Travel category or adding Marketing related posts under the Marketing category, etc…
To create a new category,
First, you need to open the WordPress dashboard, then go down in the left-hand side menu, click posts.
Choose the “Categories” option from the submenu (Posts > Categories)
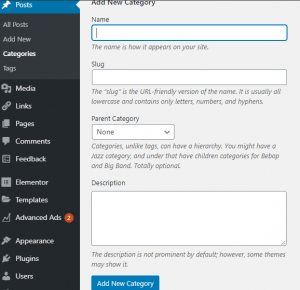
Now inside the category page, you can create a new category by adding the category name, and category description.
After you are done, click “Insert new category”
8- Preview your post before publishing
WOW, We almost are done here, just a couple of steps, revision and publishing… Good job 🙂
Let’s now preview your post before we publish.
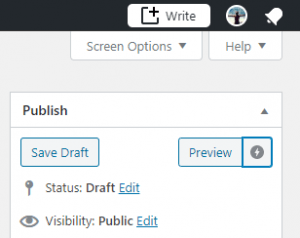
In order to preview your post click the “Preview” on the top right of the WordPress post editor window.
After that, it will open the post in a new window with the exact size and formate as your visitors see.
Feel free to save it as a draft,
so you can come back to your post to make some amendments and add some more style.
Now it is perfect, right?
Let’s publish it Now, the Last step.
9- How to publish your blog post?
Lovely, now everything is fine and the world is waiting for your first post.
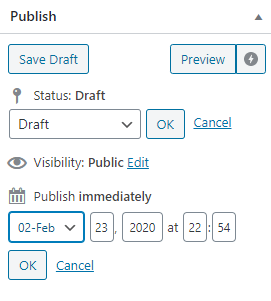
Click the “Publish” and choose either to publish your post immediately,
On the other hand, you can schedule the post by choosing the date and time you prefer to publish it.
10- How to share your blog post on social media?
Finally, you can enjoy now sharing your first post with your family, colleagues and friends.
You will find the post permalink in the top of the WordPress editor just under the post title.
After that, you can edit the link or even get a shorter link.
Now, you might copy the permalink and share it with the world 🙂
Don’t forget to share your first post link with me in the comments, let’s celebrate with it together, OK.

Final words
I wish my post “How to Start a WordPress Blog on Bluehost” was useful for you.
Please let me know if anything is not clear enough so I can enhance it in the future.
Leave me a comment with your status and if any help is required. Good Luck 🙂

2 thoughts on “How to Start a WordPress Blog on Bluehost – Ultimate Guide for 2020”